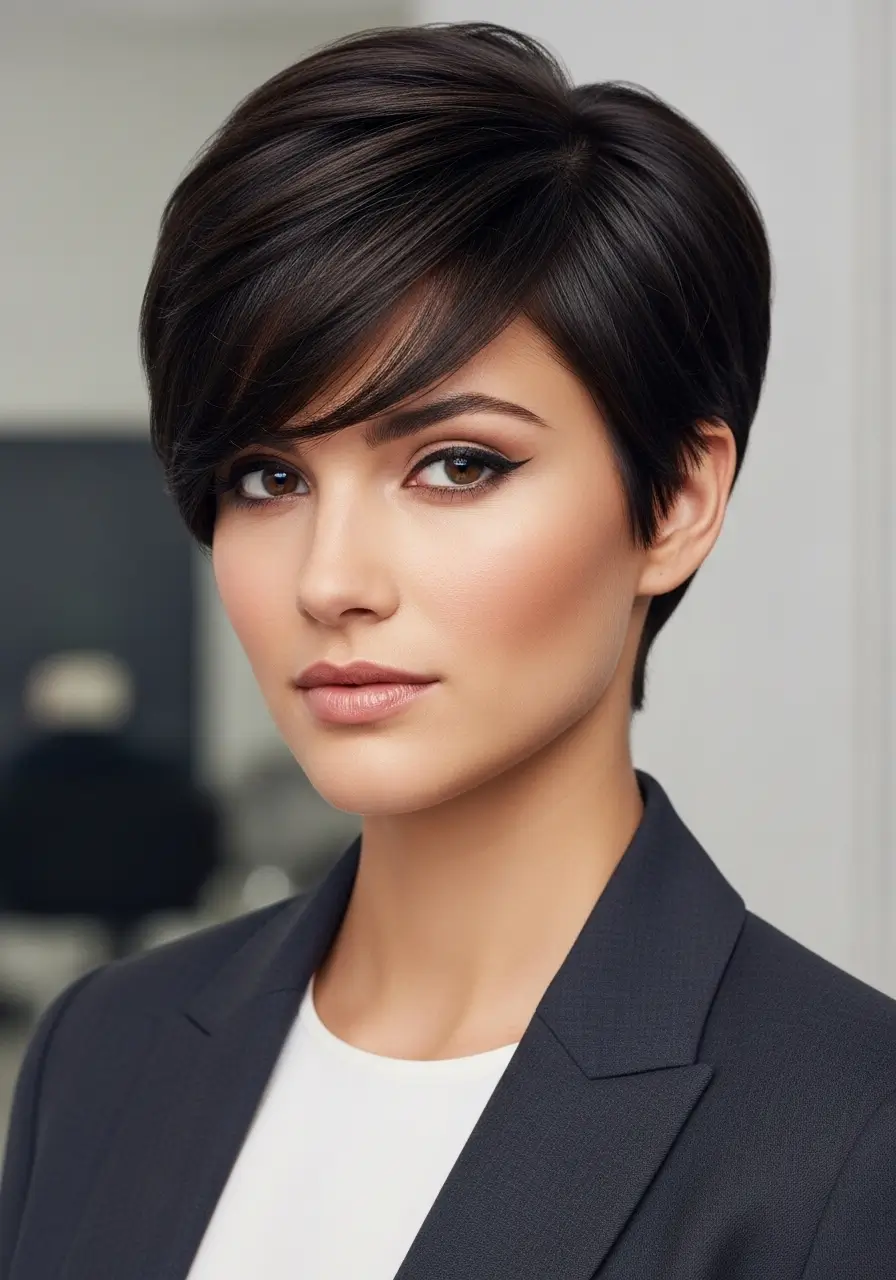
How to Style a Bixie Haircut: Your Complete Guide to Mastering This Edgy Look
Transform your bixie from basic to stunning with proven styling techniques
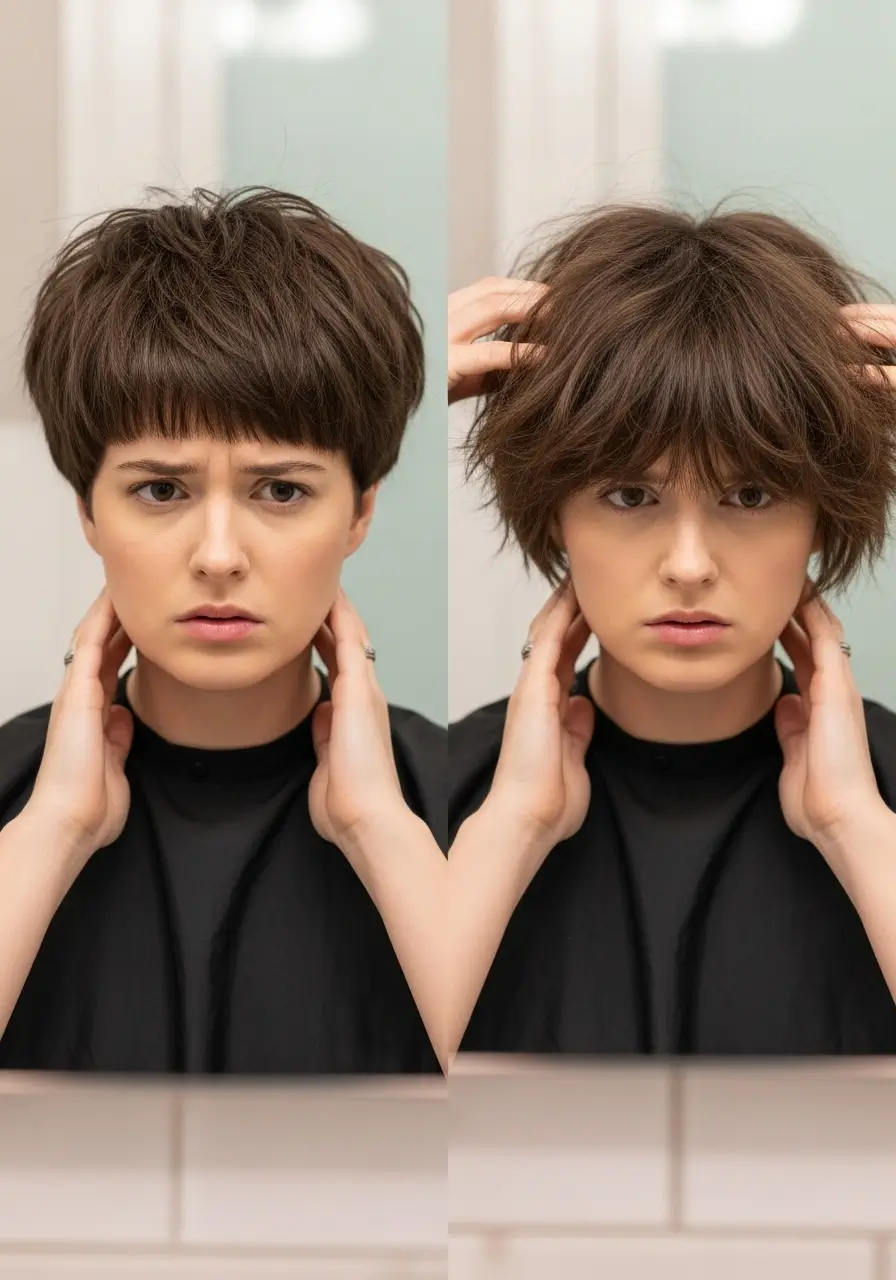
You walk out of the salon with a fresh bixie haircut, feeling on top of the world. The stylist made it look easy—tousled, textured, and perfect. But the next morning? You stare at the mirror, wondering how to recreate that magic. Sound familiar?
The bixie haircut has exploded in 2025, with search interest up 347% compared to last year. This bob-pixie hybrid delivers the best of both worlds: the edginess of a pixie with the versatility of a bob. Celebrities like Florence Pugh, Kristen Stewart, and Emma Corrin have made this cut a red carpet staple.
This guide gives you everything you need to style your bixie haircut at home. You’ll learn quick morning routines, special occasion looks, product recommendations, and troubleshooting tips. No more guessing—just results.
Understanding Your Bixie Haircut Structure
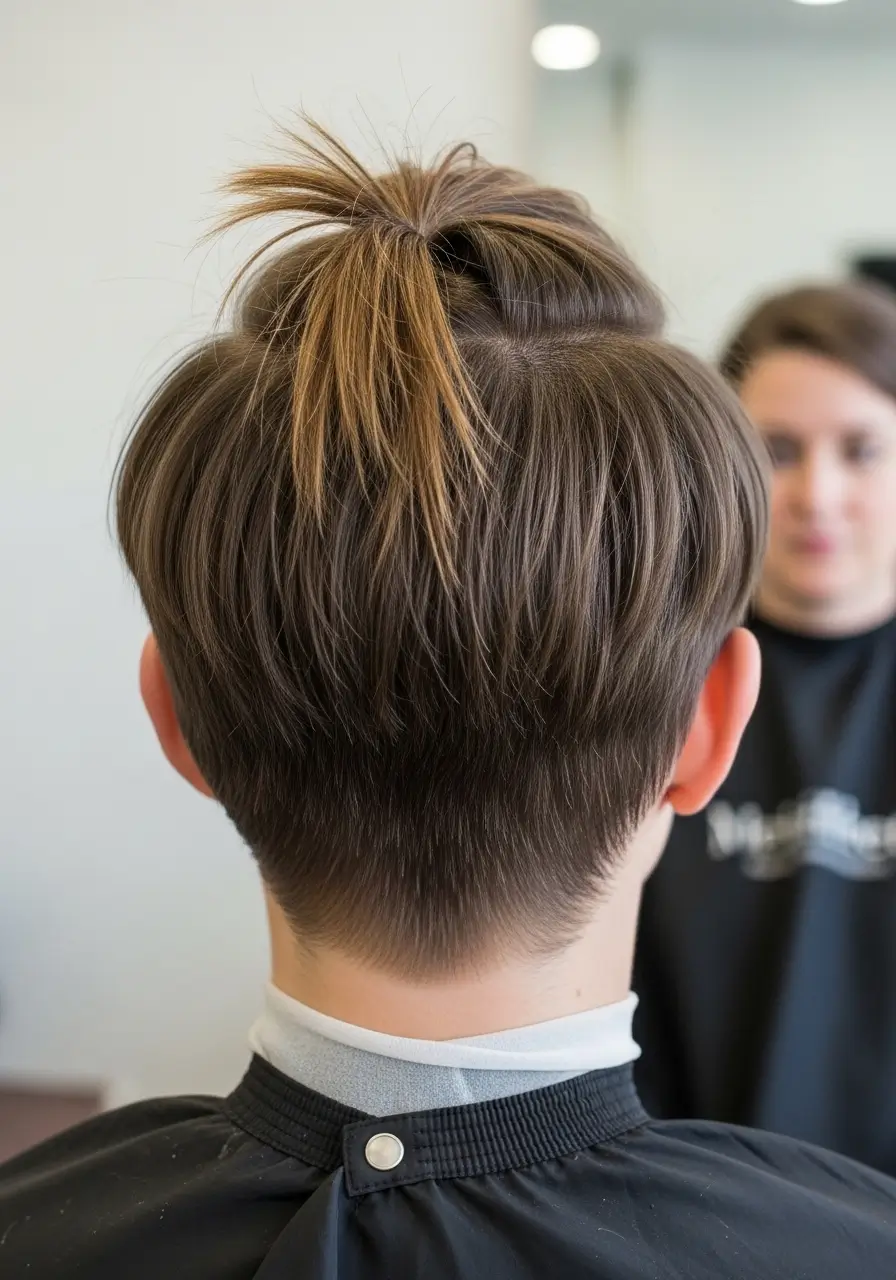
Before you grab your styling tools, you need to understand what makes a bixie special. This cut combines short layers around the crown and sides with longer pieces at the nape. The length difference creates natural movement and texture.
Most bixies fall between 2 and 4 inches on top, with the back ranging from ear-length to chin-length. Your stylist cut specific angles into your hair to create volume at the crown. These layers work with—or against—you, depending on how you style them.
Three Main Bixie Variations
Your styling approach depends on which bixie variation you have:
The Classic Bixie: Even distribution of layers with moderate length difference. This gives you the most styling flexibility and works for most face shapes.
The Textured Bixie: Choppy, piece-y layers with significant variation. This cut needs less styling but requires the right products to avoid looking messy.
The Soft Bixie: Blended layers with subtle graduation. This variation demands more styling effort but delivers a polished, professional look.
Knowing your cut helps you choose the right techniques. A textured bixie responds well to air-drying with sea salt spray. A soft bixie needs blow-drying with a round brush. The classic bixie splits the difference—you can go either way.
Essential Tools and Products for Styling Your Bixie
Walk into any beauty store and you’ll face thousands of products. You don’t need them all. Here’s what actually works for a bixie haircut.
Must-Have Styling Tools
Blow Dryer with Concentrator Nozzle: This directs airflow exactly where you need it. The precision matters more with short hair because every section shows.
Round Brush (Small to Medium): A 1.5 to 2-inch barrel gives you control over volume and direction. Skip the large brushes—they’re too big for a bixie’s short layers.
Flat Iron (0.5 to 1 inch): Not for straightening—for adding bends, flips, and texture. The narrow plates navigate short hair better than wide ones.
Teasing Comb: This creates volume at the roots when you need extra lift. The fine teeth grip short hair better than regular combs.
Core Product Collection
You need five products to cover all your bixie styling needs:
- Heat Protectant Spray: Apply this to damp hair before any heat styling. It prevents damage and helps styles hold longer. Look for formulas with silicones—they create a protective barrier.
- Texturizing Spray or Powder: This adds grip and separation to your layers. Spray it at the roots for volume or through the lengths for piece-y texture. Powder works better for fine hair.
- Light Hold Pomade or Wax: A dime-sized amount defines pieces and controls flyaways. Choose water-based formulas—they wash out easier and don’t build up.
- Volumizing Mousse: Apply this to roots before blow-drying. It lifts hair from the scalp and helps styles last all day. Skip this if you have thick or coarse hair.
- Flexible Hold Hairspray: Lock in your style without making it stiff. Hold the can 10-12 inches away and use short bursts instead of continuous spray.
Start with these basics. Add specialty products as you discover what your hair needs. According to Allure magazine’s 2025 hair trends report, people with bixie haircuts spend an average of 8 minutes styling their hair daily—less than any other short-to-medium cut.
The 5-Minute Daily Bixie Styling Routine
Mornings move fast. This routine gives you a polished bixie haircut in five minutes flat. Do it enough times and muscle memory takes over.
Step-by-Step Quick Style
Step 1: Prep Your Hair (30 seconds)
Spray damp or dry hair with heat protectant. If your hair dried overnight, mist it with water until slightly damp. Not soaking—just damp enough to reshape.
Step 2: Create Root Volume (90 seconds)
Apply a quarter-sized amount of mousse to your roots. Flip your head upside down and blow-dry the crown area using your fingers to lift sections. This creates natural volume without brush work.
Step 3: Shape the Sides (90 seconds)
Use your round brush to pull side sections back and down. Wrap hair around the brush, apply heat for 3-5 seconds, then release. This smooths the sides while maintaining some bend.
Step 4: Define the Back (60 seconds)
Twist the longer back sections around your finger while applying heat from the blow dryer. This creates soft bends instead of stick-straight ends. Let each section cool in your hand before releasing.
Step 5: Add Texture and Set (60 seconds)
Spray texturizing spray through your lengths. Scrunch and separate pieces with your fingers. Finish with a light mist of hairspray, focusing on areas that tend to fall flat.
This routine works for 80% of bixie wearers. Your hair might need small adjustments—spend an extra 30 seconds on problem areas. The key is consistency. Do this routine for two weeks and it becomes automatic.
Time-Saving Tips for Rushed Mornings
- Sleep with your hair slightly damp. It dries in a natural shape that’s easier to work with.
- Keep dry shampoo at your bedside. Apply it before you get up to absorb oil while you make coffee.
- Invest in a quality blow dryer. A 1800-watt motor cuts drying time by 40% compared to cheaper models.
- Style in the same order every day. Your brain recognizes the pattern and your hands move faster.
- Use bobby pins to hold sections while others cool. This sets the style and frees your hands.
Quick Reference: Bixie Styling Success
- ✓Always start with damp hair and heat protectant—never skip this step
- ✓Focus volume at the crown, smoothness at the sides
- ✓Less product goes further with short hair—start small and add more if needed
- ✓Let sections cool completely before touching them for styles that last
- ✓Change your part every few days to prevent hair from forming permanent dents
Advanced Styling Techniques for Different Occasions
A bixie haircut adapts to any situation. Master these techniques and you’ll style your hair for work, workouts, dates, and special events without breaking a sweat.
The Sleek Professional Look
Job interviews, client meetings, and formal events call for polished perfection. This style takes 10 minutes and stays put for 8+ hours.
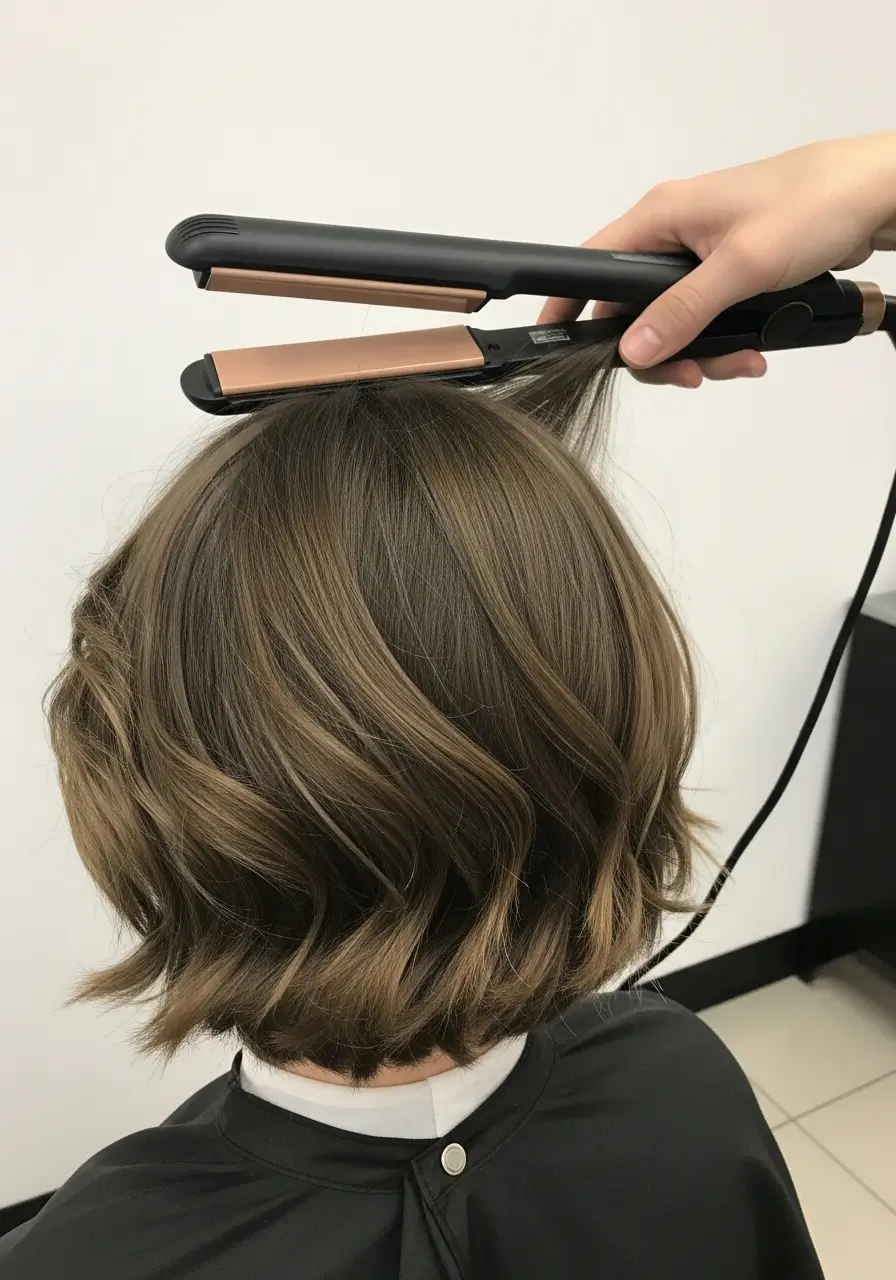
Start with completely dry hair. Apply a smoothing serum to all sections, focusing on the ends. Use your flat iron to straighten small sections, pulling hair slightly away from your face as you glide down.
Here’s the trick: run the flat iron through each section twice. First pass at medium heat to smooth. Second pass at high heat to seal the cuticle. This creates shine and eliminates frizz.
Tuck hair behind your ears and secure with small bobby pins that match your hair color. Apply strong-hold hairspray to the crown and sides. Use a boar bristle brush to smooth any flyaways while the spray is still wet.
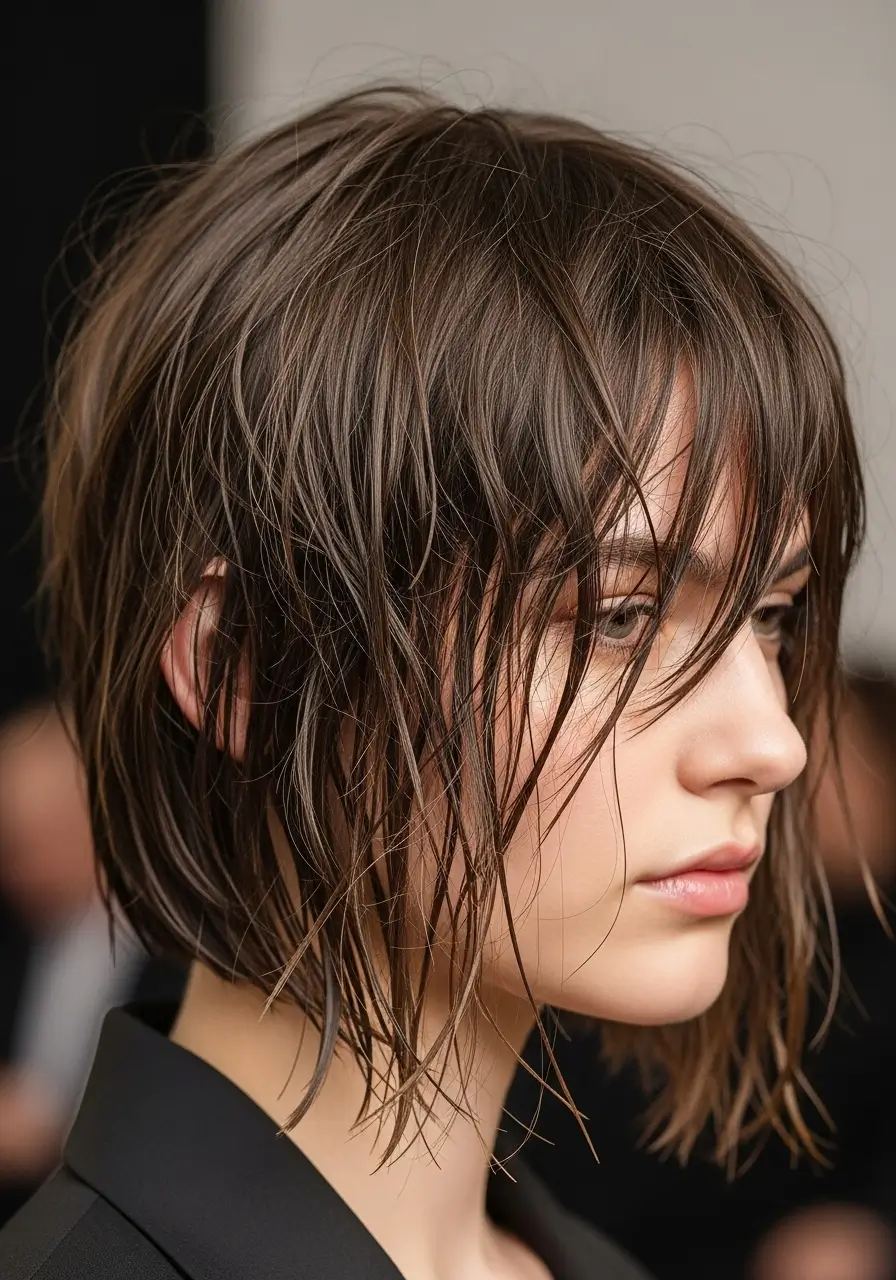
The Textured Casual Style

Weekend brunch, coffee dates, and relaxed gatherings need a style that looks effortless. The goal is “I woke up like this” energy—even though you didn’t.
Spray sea salt spray through damp hair. Scrunch sections while blow-drying on low heat. Don’t brush—let your natural texture show through. Once dry, use your fingers to separate pieces and create definition.
Take random sections and wrap them around a small curling iron for 3-5 seconds. Don’t curl everything—just 5-7 pieces throughout your head. This adds dimension without looking styled. Shake your head vigorously to blend the curls, then apply texturizing powder to the roots.
Finish by running pomade through your fingers and piecing out the ends. Pull a few face-framing pieces forward. The result looks natural but intentional.
The Edgy Evening Style

Date night, concerts, and parties let you push boundaries. This style shows off your bixie’s punk-rock potential.
Create Extreme Volume: Backcomb the crown section aggressively. Spray each layer with hairspray as you tease. This builds a foundation that won’t collapse.
Add Sharp Texture: Use strong-hold pomade to create spiky pieces throughout. Work product through small sections, then twist and pull upward. Let pieces stick out at odd angles.
Emphasize the Disconnect: Slick down the sides with gel or pomade. The contrast between the voluminous crown and smooth sides creates drama.
Set with Serious Hold: Spray everything with maximum-hold hairspray. Don’t be shy—use enough to make your hair feel slightly crunchy. It softens after 10 minutes but holds the shape.
The Athletic Active Style

Gym sessions, yoga classes, and outdoor activities demand a style that stays put. Short hair actually makes this easier than long hair.
Pin back the top section with small clips. Keep the sides smooth with a bit of gel. If you have longer pieces in the back, twist them and secure with a small claw clip.
Apply dry shampoo before your workout—not after. It absorbs sweat as you go, preventing that flat, greasy look. A sweatband pushed back from your hairline protects your style while keeping hair out of your face.
Post-workout: remove clips, flip your head upside down, and shake. The sweat actually adds texture and grip. Refresh with a quick blast of texturizing spray and you’re done.
Special Occasion Upstyles
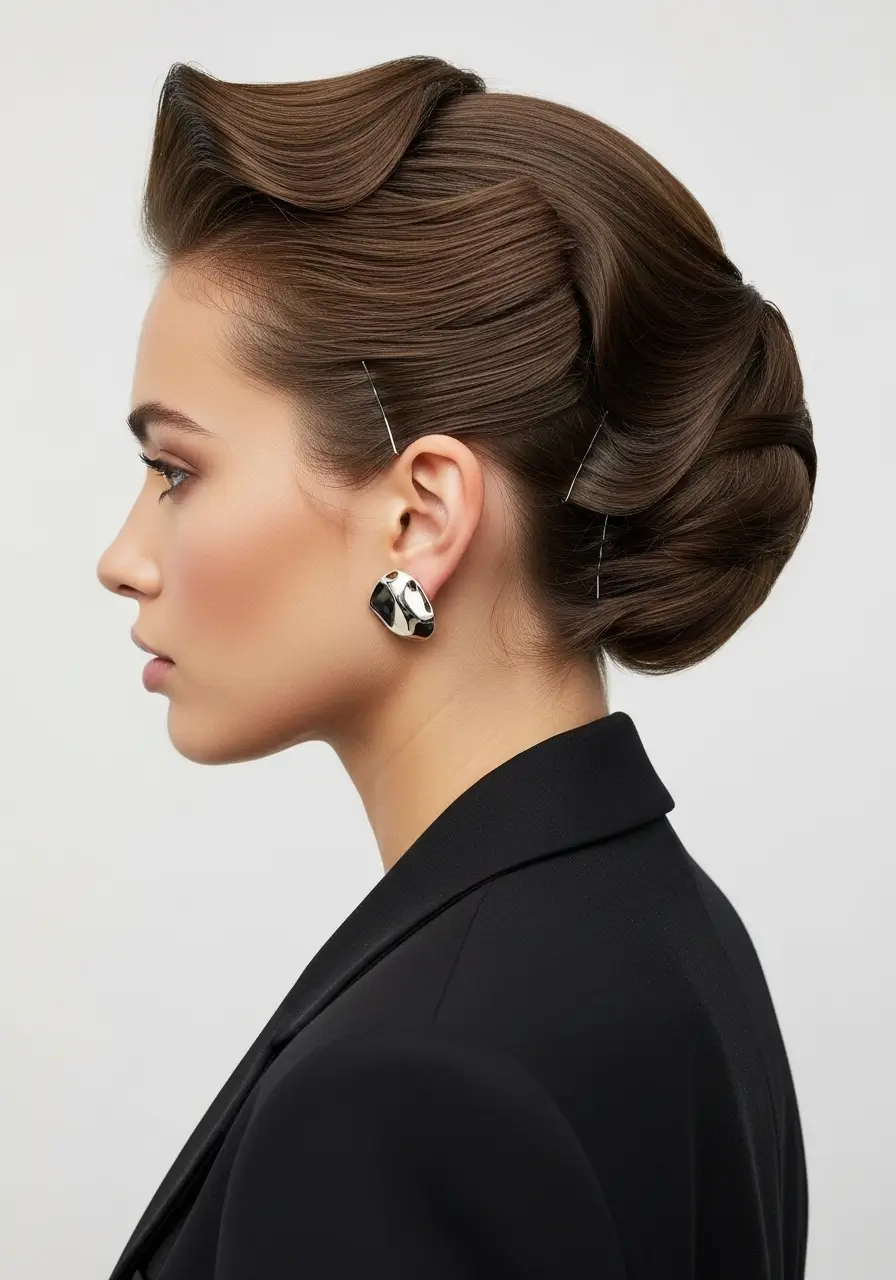
Weddings, galas, and formal events make you think “my hair is too short for an updo.” Wrong. A bixie can do elegant updos—they just look different.
Create pin curls with the longer sections. Roll small pieces around your finger, then secure flat against your head with bobby pins. Do this all over, working in rows from bottom to top.
Let the curls set while you do makeup—20 minutes minimum. Remove pins carefully and don’t separate the curls yet. Spray with strong-hold hairspray first, then gently finger-comb to blend.
Add a decorative element: pearl pins, a jeweled comb, or a silk scarf. These draw the eye and elevate the whole look. The short layers at the crown provide natural height—you don’t need to tease or add fake pieces.
Solving Common Bixie Styling Problems
Every bixie haircut comes with challenges. Hair sticks up in weird places. Styles fall flat after an hour. The back does something completely different from the front. Here’s how to fix these issues.
Problem: Hair Sticks Straight Up at the Crown
This happens when your hair’s growth pattern fights against the cut. You style it down, but it pops right back up.
The Solution: Work with the cowlick, not against it. Direct that section slightly forward instead of trying to flatten it. Use a small amount of heavy pomade to weigh it down without making it greasy.
For a permanent fix: ask your stylist to cut that section slightly longer on your next visit. The extra length adds weight and makes the hair lie flatter.
Problem: Sides Flip Out Instead of Lying Flat
The sides curve outward, making your head look wider. You want them to hug your face, but they refuse.
Blow-dry those sections in the opposite direction first. If they flip out, dry them forward toward your face. Once completely dry, brush them back into place. The hair remembers the opposite direction and stays flatter.
Use a flat iron to create a slight inward bend. Hold the iron vertically, clamp a section, and rotate inward while pulling down. One pass per section—more than that looks too styled.
Problem: Style Doesn’t Last Past Lunch

Your hair looks perfect at 8 AM. By noon, it’s flat, lifeless, and shapeless. You can’t figure out why your styles collapse so fast.
Three reasons cause this:
- You use too much product, weighing hair down
- You don’t let sections cool completely before touching them
- You skip hairspray or use a formula that’s too light
The fix: Use half the product you think you need. Let each styled section cool for 30 full seconds—count in your head. Switch to a stronger hold hairspray. These three changes make styles last 12+ hours.
Problem: The Back Doesn’t Match the Front
The front looks styled and intentional. The back looks like you forgot about it. You can’t see it while styling, so it gets neglected.
Set up a second mirror behind you. Position it so you see the back of your head in your main mirror’s reflection. This sounds obvious but most people skip it.
Style the back first, while your arms are still fresh. Most people save it for last, when they’re tired and rushing. Flip that order and the back gets proper attention.
Use your phone’s selfie camera in reverse mode. Take quick photos of the back throughout styling. This shows what others see and helps you make adjustments.
Problem: Hair Looks Stringy and Separated
Individual hairs clump together in thin, rope-like pieces. The style lacks fullness and body. It looks like you need to wash your hair—even when it’s clean.
This happens from product buildup. Your hair holds onto old styling products, creating a waxy coating. Switch to a clarifying shampoo once a week. These strip away buildup without damaging your hair.
Stop using oil-based products. They coat each strand and make hair stick together. Water-based pomades and mousses give you control without the greasiness.
Dry your hair completely before adding any styling products. Damp hair absorbs too much product, creating that stringy look. Fully dry hair takes less product and looks fuller.
Problem: Bixie Looks Too Short or Too Long
Some days your bixie haircut feels way too short—exposing too much neck and ear. Other days it looks shaggy and grown-out. The length seems to change overnight.
This is about styling direction, not actual length. When you style pieces upward and outward, the cut looks shorter. When you style them downward and forward, it looks longer.
To Make It Look Shorter: Blow-dry everything away from your face. Add volume at the crown. Keep the sides and back close to your head. Use strong-hold products.
To Make It Look Longer: Direct pieces forward and downward. Skip the volume at the crown. Let the sides and back extend away from your head slightly. Use lighter products that don’t lift.
Related Post: Stylish Puffer Coat Alternatives to Avoid the Marshmallow Look
Maintaining Your Bixie Between Salon Visits
A bixie haircut grows out faster than you’d think. The shape changes noticeably after 4-6 weeks. Smart maintenance keeps your cut looking fresh and extends time between expensive salon appointments.
The Right Trim Schedule
Book appointments every 4-6 weeks for a full cut. This maintains the bixie’s signature shape and prevents the dreaded mullet phase. Some stylists offer “mini trims” at the 3-week mark—these clean up the neckline and sides between major cuts.
According to InStyle’s professional stylist survey, regular trims save money in the long run. Hair in good shape needs less correction, so appointments take less time and cost less.
DIY Maintenance You Can Do at Home
Some maintenance doesn’t need a professional. You can handle these tasks yourself with the right tools and careful attention.
Trimming Flyaway Pieces
Style your hair normally. Look for individual hairs that stick out way beyond others. Cut them one at a time with small scissors, holding each hair taut. Never cut more than a few pieces—you’re spot-treating, not cutting.
Maintaining Face-Framing Layers
Pull a face-framing section forward. Hold it between your fingers at the desired length. Point-cut (cutting at an angle) the very ends. This softens the line and removes weight without changing the overall length.
Cleaning Up the Neckline
Use small scissors or an electric trimmer to clean the hairline at your neck. Stay below the natural hairline—don’t cut into the actual style. This keeps things looking crisp between appointments.
Protecting Your Cut While You Sleep
How you sleep affects how your bixie looks in the morning. Tossing and turning creates frizz, flattens volume, and bends hair in weird directions.
Switch to a silk or satin pillowcase. Cotton creates friction that roughens the hair cuticle. Smooth fabrics let your hair glide as you move, reducing damage and bedhead.
Pin the crown section up before bed. Use a large clip to hold it away from your head. This preserves volume and prevents flat spots. Just remember to remove it when you wake up—walking around with a clip in your hair defeats the purpose of good maintenance.
Deep Conditioning for Short Hair
Short hair needs conditioning just as much as long hair. But the approach differs. Heavy masks weigh down a bixie haircut, making it look limp and greasy.
Use lightweight conditioning treatments once a week. Apply them only to the ends—never at the roots. Leave on for 3-5 minutes, not the 20+ minutes you’d use for long hair. Short hair saturates faster and absorbs product quicker.
Skip leave-in conditioners unless your hair is extremely dry. Most people with bixies don’t need them. A regular conditioner, used correctly, provides enough moisture.
Growing Out Your Bixie Gracefully
Maybe you want to grow out your bixie. The transition can look awkward without a plan. Smart strategies keep you looking put-together through every growth stage.
- Get regular trims to maintain shape while gaining length. This seems counterintuitive but prevents the mullet phase.
- Grow the back first. Ask your stylist to keep the front and sides at their current length while letting the back extend. This creates a bob-like shape that transitions smoothly.
- Use accessories during awkward stages. Headbands, clips, and small barrettes pin back pieces that are too long to style but too short to tuck.
- Accept the in-between. Some days will look better than others. Focus on healthy hair rather than perfect styling during growth phases.
- Consider extensions for special events. Clip-in extensions blend with a growing bixie and provide temporary length when you need it.
Customizing Your Bixie Style for Your Hair Type
Not all hair behaves the same way. Your bixie haircut needs different approaches depending on whether your hair is fine, thick, curly, or straight. These adjustments make the difference between struggling with your style and loving it.
Fine or Thin Hair
Fine hair loves the bixie structure. The layers create an illusion of thickness. But you need to style it carefully to avoid a flat, lifeless look.
Skip heavy products completely. They weigh down fine hair and make it look greasy. Use volumizing mousse at the roots and light hairspray for hold. That’s it—nothing else.
Blow-dry with your head upside down. This lifts roots away from your scalp and creates natural body. Focus heat at the roots first, then smooth the lengths.
Tease the crown section before styling. Backcomb in small sections, spraying each layer with hairspray. This builds a foundation that supports your style all day. Smooth the top layer over the teased section so it doesn’t look messy.
Thick or Coarse Hair
Thick hair can overwhelm a bixie if not styled properly. Too much volume makes your head look huge. Not enough taming makes you look unkempt.
Use smoothing products with silicones. They coat each strand and reduce bulk. Apply a smoothing cream to damp hair before blow-drying.
Blow-dry in sections, using the concentrator nozzle to direct airflow down the hair shaft. This smooths the cuticle and reduces frizz. Pull sections taut with your brush while applying heat.
Ask your stylist about thinning shears on your next visit. They remove bulk without affecting length. The right amount of thinning makes thick hair more manageable while maintaining the bixie’s structure.
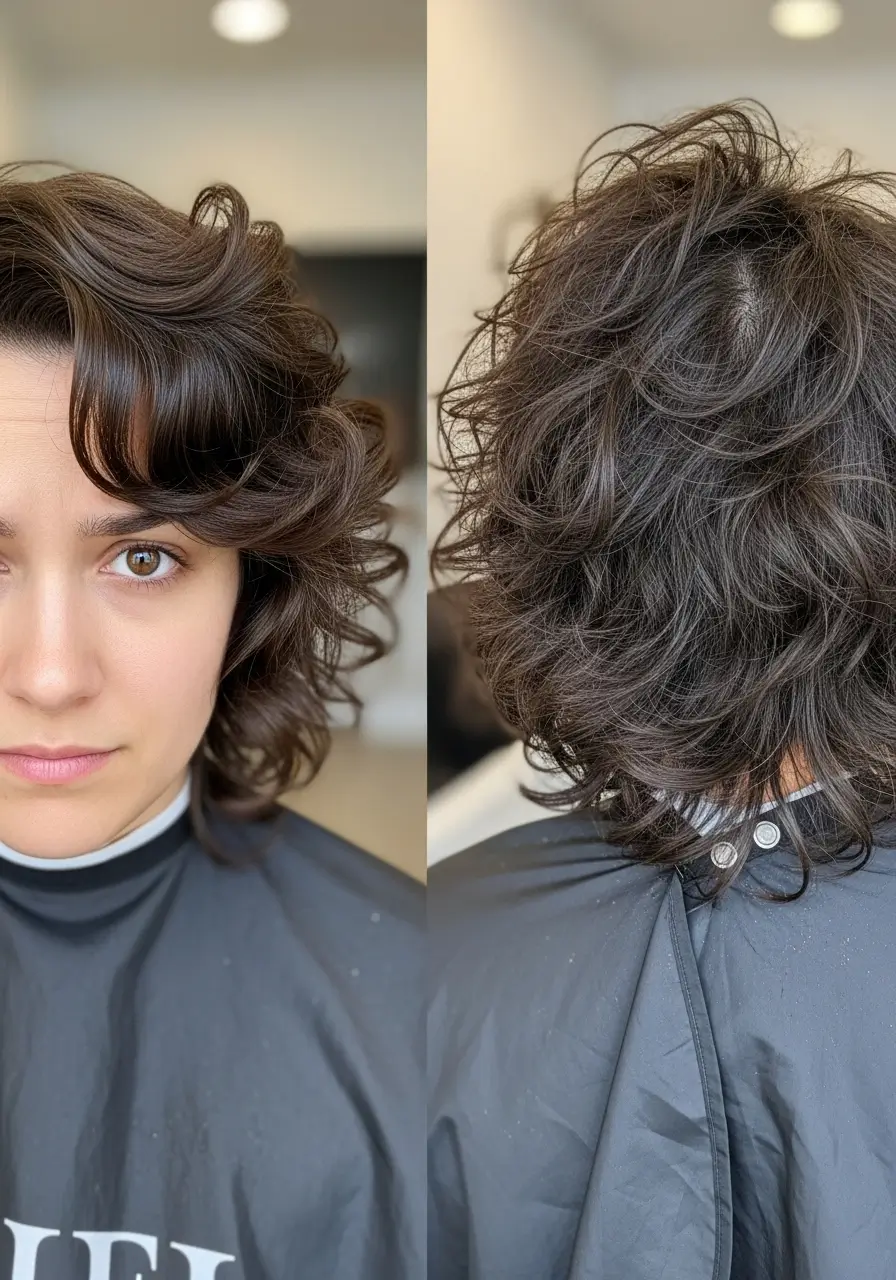
Curly or Wavy Hair
Curly hair in a bixie haircut creates a fun, textured look. But curls behave differently at different lengths. The short layers at the crown might curl tight while longer pieces in back barely wave.
Apply curl cream to soaking wet hair. Scrunch sections gently, then let air-dry or use a diffuser on low heat. Don’t touch your hair while it dries—touching creates frizz.
Once completely dry, scrunch again to break up any crunchy texture from styling products. Use a tiny amount of oil on your fingertips to smooth flyaways around your face.
Sleep with a silk or satin bonnet. This preserves curls overnight so you wake up with defined ringlets instead of a frizzy mess. Refresh in the morning with a mist of water and a bit more curl cream.
Straight Hair
Straight hair shows every cut and styling mistake. It also reveals product buildup and damage faster than other hair types. The advantage? It takes styling quickly and holds shapes well.
Add texture with a flat iron. Create bends and waves throughout instead of leaving hair pin-straight. This adds dimension and prevents that “helmet head” look.
Use dry shampoo as a styling product, not just for oil absorption. Spray it at the roots when your hair is clean and dry. It adds grip and makes straight hair easier to manipulate.
Change your part frequently. Straight hair forms permanent parts if you always style it the same way. Switch between side parts, center parts, and no part at all. This prevents dents and keeps the style looking fresh.
Color-Treated Hair
Hair color adds another variable to styling. Bleached hair behaves differently than virgin hair. Highlights create texture that can help or hurt your bixie styling efforts.
Use heat protectant every single time you style. Color-treated hair is more porous and absorbs heat damage faster. Don’t skip this step—ever.
Lower your tool temperatures by 20-30 degrees. Damaged hair needs less heat to achieve the same results. Start at 300°F instead of 350°F and adjust up only if needed.
Apply a gloss treatment every 2-3 weeks. These add shine to dull, color-treated hair and temporarily seal the cuticle. Your bixie looks healthier and styles hold better on smooth, glossy hair.
Budget-Friendly Tips for Styling Your Bixie
Professional styling products and tools cost serious money. A full bixie styling kit can run $200-300 if you buy everything at once. Smart shopping and DIY alternatives keep costs down without sacrificing results.
Drugstore Products That Actually Work
Expensive doesn’t always mean better. These affordable products perform as well as their luxury counterparts:
TRESemmé Thermal Creations Heat Tamer Spray: This costs $6 and protects hair up to 450°F. Professional heat protectants cost $20-30 and do the same job.
Got2b Powder’ful Volumizing Styling Powder: A $7 alternative to expensive texturizing powders. It adds grip and volume without making hair look dirty.
Herbal Essences Body Envy Volumizing Mousse: Costs $5 and creates long-lasting lift at the roots. Works as well as salon brands that cost four times more.
Suave Professionals Firm Control Finishing Hairspray: A $3 hairspray that holds styles without stiffness. Many stylists use this in their kits despite having access to pricey alternatives.
DIY Styling Product Recipes
Make your own products at home using basic ingredients. These recipes work well for bixie styling and cost pennies per batch.
Homemade Sea Salt Spray: Mix 1 cup warm water, 1 tablespoon sea salt, 1 teaspoon coconut oil, and 1 teaspoon gel in a spray bottle. Shake before each use. This creates beachy texture without the $15 price tag.
Natural Pomade: Melt 2 tablespoons coconut oil with 1 tablespoon beeswax. Remove from heat and add 5 drops of your favorite essential oil. Pour into a small container and let cool. This pomade defines pieces and controls flyaways.
Volumizing Dry Shampoo: Mix 2 tablespoons cornstarch or arrowroot powder with 1 tablespoon cocoa powder (for dark hair) or cinnamon (for red hair). Leave out the cocoa/cinnamon if you have blonde hair. Apply with a makeup brush at the roots.
When to Splurge and When to Save
Some tools and products justify the cost. Others don’t matter as much. Spend money where it makes a real difference.
Worth the Investment:
- Quality blow dryer with high wattage (1800-2000 watts)
- Ceramic or titanium flat iron with adjustable temperature
- Professional cutting scissors (if you plan to do any home trims)
- Good quality round brush that won’t snag or break hair
Where You Can Save:
- Hairspray—drugstore versions work just as well
- Regular combs and clips—function matters more than brand
- Heat protectant—active ingredients are the same across price ranges
- Styling accessories like bobby pins and hair ties
Extending Product Life
Make your products last longer with these simple habits:
Store products in cool, dark places. Heat and light break down active ingredients faster. Keep styling products in a cabinet, not on your bathroom counter.
Use the right amount—more doesn’t equal better results. Start with half the recommended amount. You can always add more, but you can’t remove excess without washing.
Clean your tools regularly. Product buildup on brushes, combs, and flat irons makes them work less well. This forces you to use more product to achieve the same results. Wash tools weekly with shampoo and warm water.
Pump bottles waste less than spray bottles. Transfer products to pump containers when possible. Sprays dispense more product per use than pumps, making bottles empty faster.
Frequently Asked Questions
How often should I wash my bixie haircut?
Wash your bixie every 2-3 days for best results. Daily washing strips natural oils that help with styling and protection. Short hair shows oil less than long hair, so you can stretch wash days further. Use dry shampoo on off days to absorb excess oil at the roots. If you work out daily or have very oily hair, rinse with water and use conditioner on the ends without shampooing every day. This keeps hair clean without over-stripping it.
Can I air-dry my bixie or do I need to blow-dry it every time?
You can definitely air-dry a bixie haircut, but it requires the right technique. Apply mousse or sea salt spray to damp hair, then scrunch and shape with your fingers. Let it dry completely without touching it—touching creates frizz. The result is more textured and casual than blow-dried styles. However, if you want a polished, smooth look or need your hair to lie a certain way, blow-drying works better. Many people blow-dry during the week for work and air-dry on weekends for a relaxed vibe.
What’s the best way to add volume to a flat bixie?
Volume starts at the roots. Apply volumizing mousse to damp hair, focusing on the crown. Blow-dry with your head upside down, using your fingers to lift sections away from your scalp. Once dry, flip right-side up and use a teasing comb to backcomb the crown in small sections. Spray each teased section with hairspray before moving to the next. Smooth the top layer over the teased hair to hide the backcombing. Use texturizing powder at the roots for extra lift. This combination creates volume that lasts all day. Avoid heavy products—they weigh hair down and cancel out your volume efforts.
How do I keep my bixie from looking like a mullet as it grows?
The key is strategic maintenance during the grow-out phase. Get trims every 4-5 weeks, asking your stylist to keep the back slightly shorter than the sides while maintaining overall shape. This prevents the back from getting too long compared to the front—the main cause of accidental mullets. Style the back pieces forward and under instead of letting them hang straight down. Use bobby pins to tuck longer pieces during the awkward stage. Consider getting a subtle undercut at the nape to reduce bulk as hair grows. Accept that 2-3 months into growing out, you’ll hit an in-between phase. Plan ahead with accessories and alternative styling methods for this period.
What should I tell my stylist if my bixie isn’t styling the way I want?
Bring photos of how your hair looks when you style it at home, not just inspiration pictures. Explain which areas give you trouble—the sides flip out, the crown won’t lift, the back doesn’t match the front. Ask specific questions: “Can you cut this shorter so it doesn’t stick up?” or “Should these layers be longer to add weight?” Request a styling demonstration during your appointment. Most stylists will show you their techniques if you ask. Take notes or record video on your phone so you remember the process at home. Discuss your morning routine and time constraints—your stylist can adjust the cut to work with your lifestyle. Don’t wait until you’re frustrated. Address styling issues at your next regular trim instead of letting them build up.
Final Thoughts
Styling a bixie haircut gets easier with practice. Those first few attempts might frustrate you. Your hair won’t cooperate. Products won’t work right. Styles won’t last. That’s normal. Every person with a bixie went through this learning curve.
Stick with the basics in this guide. Master the 5-minute daily routine before trying complex styles. Learn what your specific hair needs—fine hair wants different products than thick hair. Curly bixies style differently than straight ones. Your hair teaches you what works through trial and error.
Take photos of successful styles. Record what products you used and what techniques worked. This creates a reference library for future styling sessions. You’ll discover your go-to looks—the styles you can create in your sleep because you’ve done them dozens of times.
The bixie haircut gives you freedom to experiment. Some days go sleek and polished. Other days embrace texture and chaos. Your hair, your choice. Master the fundamentals, then break the rules and create something uniquely yours.