Transform your backyard into a functional retreat where memories happen
Your outdoor living space holds untapped potential. Right now, you might see a plain deck or a patch of grass. But imagine stepping outside to find a comfortable retreat where you sip morning coffee, host weekend barbecues, and watch your kids play under the stars. Creating this space doesn’t require a massive budget or professional design skills. You just need the right approach and practical knowledge to turn your backyard into an extension of your home.
Americans spend more time at home than ever before. We’re investing in our properties and seeking ways to maximize every square foot. An outdoor living space delivers exceptional value by expanding your usable area, boosting property value, and improving quality of life. This guide walks you through every step of planning, designing, and building an outdoor space that fits your lifestyle and budget.
Understanding Outdoor Living Spaces in 2025
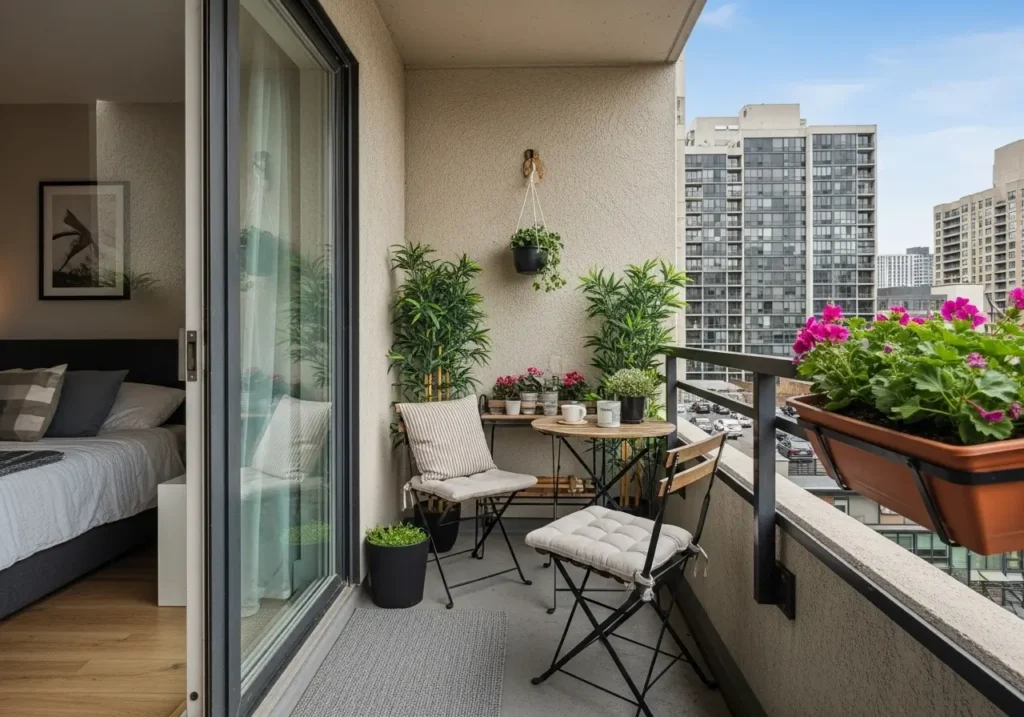
An outdoor living space means different things to different people. For some, it’s a simple patio with comfortable chairs. For others, it’s a full outdoor kitchen with a dining area, fire pit, and entertainment zone. The definition matters less than the function. Your space should serve your specific needs and reflect how you want to use it.
The outdoor living trend has exploded over the past five years. According to recent data from the National Association of Home Builders, outdoor living features now rank among the top three most-requested home improvements. Homeowners recognize that these spaces offer a unique blend of relaxation, entertainment, and connection with nature.
Modern outdoor living spaces go beyond a simple deck with a grill. They incorporate multiple zones, weather protection, comfortable furnishings, and thoughtful lighting. You can cook, dine, relax, work, exercise, or entertain guests—all without stepping inside. This versatility makes outdoor spaces valuable investments that pay dividends through daily use and increased home value.
Key Benefits You’ll Gain
Building an outdoor living space delivers tangible benefits that extend far beyond aesthetics. You’ll expand your home’s functional square footage without the cost of an addition. A well-designed outdoor area can add 15-20% to your property value, making it one of the smartest home improvements you can make.
Your mental and physical health improve when you spend more time outdoors. Natural light boosts mood and regulates sleep cycles. Fresh air and nature exposure reduce stress and increase focus. An inviting outdoor space makes it easy to incorporate these benefits into your daily routine.
Social connections strengthen when you have a comfortable place to gather. Instead of crowding around the kitchen island, you can spread out across different zones. Kids play in sight while adults converse nearby. Guests linger longer when the environment feels welcoming and comfortable.
Planning Your Outdoor Living Space Layout
Successful outdoor spaces start with solid planning. You need to assess what you have, determine what you want, and create a realistic path between the two. This process takes time, but rushing leads to costly mistakes and spaces that don’t meet your needs.
Assess Your Current Situation
Walk through your yard and note everything relevant. Measure the space accurately. Identify which areas get sun throughout the day and which stay shaded. Check for drainage issues—water pooling after rain indicates problems you’ll need to address.
Consider access points from your house. The best outdoor living spaces flow naturally from indoor areas. French doors from the kitchen make sense if you plan to cook and dine outside. A bedroom door works well for a quiet morning coffee spot.
Evaluate existing features like trees, slopes, utilities, and property lines. Mature trees provide valuable shade but limit where you can build. Underground utilities restrict digging. Property setbacks and local codes may dictate where structures can go. Contact your local building department early to understand requirements in your area.
Define Your Must-Have Features
List how you want to use the space. Be specific. Don’t just write “relaxation”—describe what that looks like. Maybe you want to read in a hammock, practice yoga on a flat surface, or meditate by a water feature. Specific goals lead to better design decisions.
Rank your priorities. You probably can’t include everything in the first phase. Identify which features matter most and which you can add later. This approach keeps the project manageable and prevents budget overruns.
Think about capacity. How many people will typically use the space? Plan for your regular household plus a few guests. You can always bring out extra chairs for big parties, but the core layout should accommodate normal use comfortably.
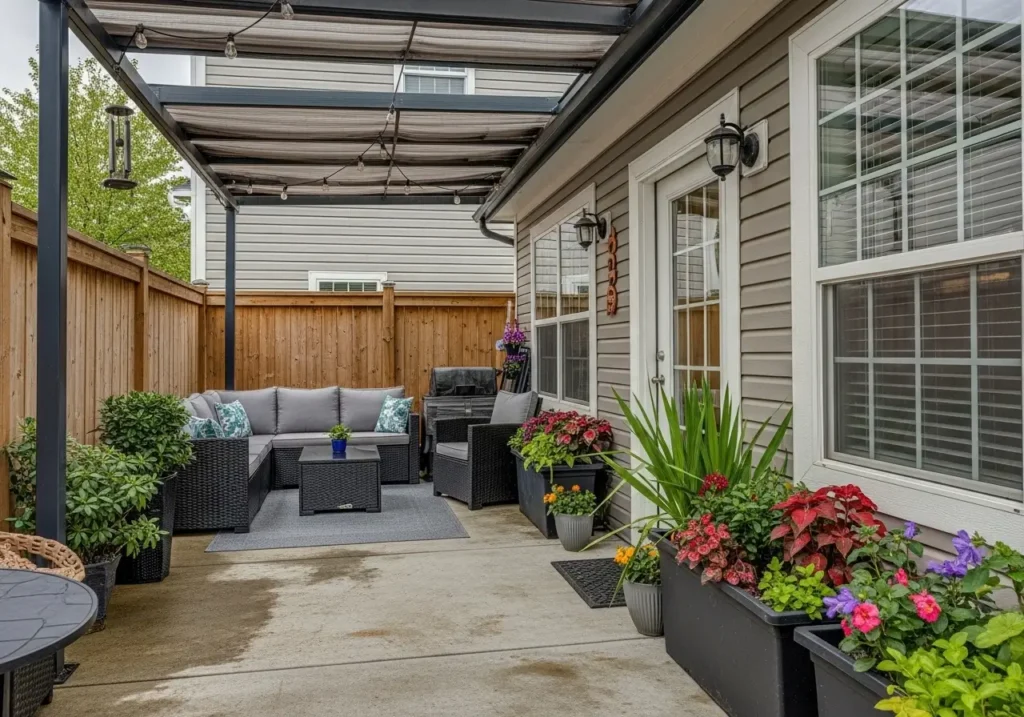
Create Functional Zones
Divide your outdoor living space into distinct areas based on activities. This organization improves flow and makes the space more usable. Common zones include cooking, dining, lounging, playing, and transitional pathways between areas.
The cooking zone needs adequate prep space, storage, and clearance around the grill or outdoor kitchen. Position it close to the indoor kitchen to minimize trips back and forth. Include a small table or counter for staging food and a trash receptacle within easy reach.
Your dining area should sit adjacent to but separate from the cooking zone. This arrangement lets the chef interact with diners without bumping into them. Size the table to your typical guest count plus two extra seats. Round tables encourage conversation, while rectangular tables fit narrow spaces better.
Lounging areas deserve the best views and most comfortable seating. Position them away from active zones to create a sense of retreat. Include a side table for drinks and books, good lighting for evening use, and consider adding a fire feature for warmth and ambiance.
Planning Essentials for Your Outdoor Space:
- ✓Measure your space accurately and note sun patterns throughout the day
- ✓Check local building codes before starting any construction projects
- ✓Create distinct zones for cooking, dining, and relaxing to improve flow
- ✓Prioritize features based on how you’ll actually use the space
- ✓Plan for comfortable capacity that accommodates your household plus guests
Choosing Materials That Last
Material selection makes or breaks an outdoor living space. The wrong choices lead to constant maintenance, premature replacement, and frustration. The right materials deliver years of reliable performance with minimal upkeep.
Foundation and Flooring Options
Your foundation determines structural integrity and longevity. Concrete provides the most durable base for patios and outdoor kitchens. It handles heavy loads, resists moisture, and lasts decades. Stamped or stained concrete offers visual appeal beyond basic gray slabs.
Pavers create a more upscale look and easier repairs. If one cracks, you replace just that piece instead of patching concrete. Concrete pavers cost less than natural stone but still deliver good performance. They come in numerous colors, shapes, and textures to match any design style.
Natural stone like flagstone, bluestone, or travertine brings timeless beauty. These materials cost more upfront but add significant value. Stone stays cool underfoot in summer and develops an appealing patina over time. Proper installation with good drainage ensures decades of service.
Composite decking makes sense for raised outdoor living spaces. Modern composites resist fading, staining, and splintering far better than wood. They require minimal maintenance—just occasional cleaning with soap and water. Quality brands back their products with 25-year warranties.
Structure and Shade Materials
Pergolas, arbors, and roof structures extend usability by providing shade and weather protection. Treated lumber remains the most affordable option but requires regular maintenance. Cedar and redwood resist rot naturally and look beautiful but cost more.
Aluminum pergolas never rot, warp, or need painting. They support heavier loads and span longer distances than wood. Many manufacturers offer powder-coated finishes that mimic wood grain while delivering superior durability.
Fabric canopies and retractable awnings provide adjustable shade. You can extend them on hot days and retract them in winter or during storms. Modern outdoor fabrics resist UV damage, mildew, and fading for years. Look for solution-dyed acrylic fabrics with at least five-year warranties.
Furniture and Fixture Selection
Outdoor furniture must withstand sun, rain, temperature swings, and daily use. Skip cheap pieces that fall apart after one season. Quality furniture costs more initially but lasts years longer and looks better throughout its life.
Aluminum frames with powder-coated finishes resist rust and support significant weight. Resin wicker over aluminum combines durability with aesthetic appeal. Look for UV-resistant wicker that won’t fade or become brittle in sunlight.
Cushion fabric matters as much as frame quality. Solution-dyed acrylic resists fading better than other materials. It also resists mildew and cleans easier. Quick-dry foam cores prevent moisture buildup inside cushions. Even with quality materials, store cushions during extended periods of non-use.
Teak furniture represents the gold standard for outdoor durability. This dense hardwood contains natural oils that repel moisture and resist insects. Left untreated, teak weathers to an attractive silver-gray patina. You can maintain the original honey color with annual oil treatments.
Designing for Comfort and Function
A beautiful outdoor living space that’s uncomfortable or impractical sits unused. Design decisions should prioritize how the space feels and functions over how it looks in photos. Comfort and usability create spaces people actually want to spend time in.
Climate Control Solutions
Temperature extremes limit outdoor time. Strategic design extends your season by moderating heat and cold. Start with shade—it makes the biggest difference on hot days. Trees provide natural shade but take years to mature. Pergolas, umbrellas, and shade sails deliver immediate relief.
Ceiling fans move air and create a cooling breeze. Outdoor-rated fans withstand moisture and temperature swings. Install them under covered areas for maximum effect. They can make temperatures feel 5-10 degrees cooler through increased air movement.
Heating extends outdoor season into cooler months. Fire pits and fireplaces create natural gathering points while radiating warmth. Propane patio heaters warm specific zones without permanent installation. Infrared heaters mounted overhead deliver efficient warmth without wasting energy heating air.
Misters cool through evaporation on extremely hot days. They work best in dry climates where moisture evaporates quickly. In humid regions, fans prove more effective than misters for cooling.
Lighting for Ambiance and Safety
Good lighting transforms outdoor spaces after sunset. You need layers of light serving different purposes. Task lighting illuminates cooking and dining areas. Ambient lighting creates mood and atmosphere. Safety lighting prevents trips and falls on steps and pathways.
LED fixtures provide the best value for outdoor lighting. They use minimal electricity, last for years, and produce little heat. Many now offer dimming and color-changing capabilities controlled from your smartphone.
Position lights to avoid glare in eyes. Mount fixtures higher than head height or use shields that direct light downward. Uplighting trees and architectural features adds drama. String lights create a festive atmosphere perfect for entertaining.
Low-voltage systems offer easier installation and safer operation than line-voltage systems. The transformer steps down household current to 12 volts, reducing shock risk. You can install low-voltage lights yourself without an electrician in most areas.
Privacy and Screening
Privacy enhances comfort and relaxation. Nobody wants neighbors watching every outdoor activity. Strategic screening creates intimate spaces without completely closing off the area.
Living screens from plants and trees provide natural beauty along with privacy. Evergreens maintain coverage year-round. Bamboo grows fast but spreads aggressively—use clumping varieties or install root barriers. Hedge plants like privet or boxwood create formal borders that you can shape and maintain.
Fencing offers immediate privacy in any style from modern horizontal slats to traditional pickets. Wood fencing costs less initially but requires maintenance. Vinyl and composite fencing never need painting and resist rot and insects.
Outdoor curtains, screens, and lattice add privacy while maintaining airflow. Mount curtains on tracks or cables for easy adjustment. Retract them when privacy isn’t needed. Metal or wood lattice panels provide partial screening that doesn’t feel closed-in.
Building Your Outdoor Kitchen
An outdoor kitchen ranks among the most popular features in modern outdoor living spaces. It centralizes food prep, cooking, and cleanup outside, keeping heat and mess out of your house. But outdoor kitchens require careful planning to function well.
Essential Components
Start with the basics before adding luxury features. A quality grill forms the foundation of any outdoor kitchen. Choose between gas for convenience or charcoal for flavor. Built-in grills integrate into countertops for a clean, professional look.
Counter space on both sides of the grill gives you room to prep and stage food. Plan for at least two feet on each side. More is better—you can never have too much prep space. Use granite, concrete, or tile for countertops that withstand weather and heat.
Storage keeps tools, utensils, and supplies organized and protected. Stainless steel cabinets resist rust and clean easily. Include drawers for small items and larger cabinets for propane tanks and bulky equipment. Weatherproof storage prevents rust and deterioration.
A sink with running water eliminates trips inside for cleanup. Connect to your home’s water supply and install proper drainage. Include a garbage disposal if local codes allow. Position the sink between prep and cooking areas for efficient workflow.
Upgrade Features Worth Considering
Side burners expand cooking capacity. You can boil water, simmer sauces, or cook sides while grilling the main course. Gas burners provide instant heat control. Some outdoor kitchens include electric burners for precise temperature control.
Refrigeration keeps drinks cold and ingredients fresh. Outdoor-rated refrigerators withstand temperature fluctuations and moisture better than indoor units. They cost more but last longer in exterior conditions. Budget options include simple ice chests built into the counter.
Pizza ovens have surged in popularity. Wood-fired ovens deliver authentic results but require skill to operate. Gas pizza ovens heat faster and maintain temperature easier. Pre-made models start around $500, while custom built-in versions cost several thousand dollars.
Beverage centers combine refrigeration, storage, and serving areas. Include a small sink for rinsing glasses, an ice maker for constant supply, and racks for wine or beer. This setup keeps guests self-sufficient so the host can focus on cooking.
Layout and Workflow
Efficient outdoor kitchens follow the same work triangle principle as indoor kitchens. Position the refrigerator, sink, and grill to minimize steps between stations. The triangle should measure 12-25 feet total with no single leg shorter than 4 feet or longer than 9 feet.
Linear layouts work well for narrow spaces. Arrange everything along one wall or counter. This design maximizes efficiency in tight quarters but requires more walking between stations.
L-shaped configurations provide good workflow and open sight lines. The cook can interact with guests while preparing food. This layout fits corner locations well and creates a defined kitchen zone.
U-shaped or island designs suit large spaces. They offer maximum storage and counter space. Islands create natural gathering spots where guests can chat with the cook without getting in the way.
Adding Fire Features for Warmth and Atmosphere
Fire draws people together like nothing else. A fire feature becomes the natural focal point of your outdoor living space, creating warmth, light, and an inviting atmosphere. Options range from simple portable fire pits to elaborate custom fireplaces.
Fire Pit Options
Portable fire pits offer flexibility and affordability. Metal bowls, cast iron designs, and modern steel options start around $100. You can move them around the yard or store them when not in use. Most burn wood, though some accept gas attachments for cleaner burning.
Built-in fire pits create permanent gathering spots. Stone or brick construction blends with landscaping and provides stable, safe operation. Size them appropriately for your space—36 to 48 inches in diameter works for most residential settings. Include seating walls around the perimeter for permanent seating.
Gas fire pits eliminate smoke and cleanup. Connect to your home’s natural gas line or use propane tanks. Gas pits ignite instantly with a switch or remote control. Many include decorative fire glass or lava rock that glows attractively when heated.
Fire tables combine function and style. The fire pit sits in the center of a table surface, providing warmth while preserving table space. Guests can set drinks and plates on the table edge. Fire tables work well on covered patios where traditional fire pits might not be practical.
Outdoor Fireplaces
Outdoor fireplaces make dramatic statements and radiate significant heat. They anchor outdoor living spaces and create rooms without walls. Fireplaces cost more than fire pits but deliver greater visual impact and functional value.
Traditional masonry fireplaces require substantial foundations and professional construction. Stone or brick construction suits various architectural styles. These substantial structures become permanent features that boost property value significantly.
Pre-manufactured fireplace kits simplify installation. Metal shells get covered with stone veneer or stucco to match your desired aesthetic. Kits include all necessary components and detailed instructions. Competent DIYers can complete installation over a weekend.
Gas fireplaces provide the easiest operation and maintenance. They light instantly, produce no smoke or ash, and require minimal cleanup. Modern gas fireplaces create realistic flame patterns that mimic wood-burning fires. Operating costs run $1-2 per hour depending on local gas prices.
Safety Considerations
Fire features require careful attention to safety. Position them away from structures, overhangs, and flammable materials. Most codes require at least 10 feet of clearance from buildings. Check your local fire code for specific requirements.
Provide adequate ventilation for any fire feature. Never use a fire pit or fireplace under a completely enclosed roof. Smoke and carbon monoxide need somewhere to escape. Partially covered areas work fine with proper clearance and ventilation.
Keep fire extinguishers or water sources nearby. A garden hose or bucket of sand lets you quickly control any issues. Never leave fires unattended, especially around children or pets. Fully extinguish fires before going inside or going to bed.
Install spark screens on wood-burning pits and fireplaces. Screens prevent embers from flying out and starting fires on combustible surfaces. They also protect people and pets from accidental contact with flames.
Landscaping and Plant Integration
Plants soften hardscapes and connect outdoor living spaces with the natural environment. Strategic landscaping adds color, texture, fragrance, and seasonal interest while serving practical functions like privacy, shade, and wind protection.
Choosing the Right Plants
Select plants suited to your climate and specific site conditions. Check your USDA hardiness zone and choose plants rated for your zone or colder. Consider sun exposure, soil type, and water availability. Native plants typically require less maintenance and thrive better than exotic species.
Evergreen plants provide year-round structure and privacy. Broadleaf evergreens like holly, rhododendron, and boxwood maintain green foliage through winter. Needle evergreens like pine, spruce, and juniper offer different textures and forms.
Deciduous plants change with seasons, providing dynamic interest. Spring flowers give way to summer foliage, fall color, and winter branching patterns. These plants often flower more prolifically than evergreens and offer seasonal variety.
Combine different plant types for layered interest. Use tall trees for shade and structure, medium shrubs for screening and mass, and low perennials for color and texture. This layering creates depth and visual appeal.
Container Gardening
Containers add flexibility to outdoor living spaces. You can move pots to change arrangements, bring tender plants inside during winter, and refresh plantings seasonally. Containers work especially well on patios and decks where in-ground planting isn’t possible.
Choose pots large enough for root growth. Bigger pots hold more soil, retain moisture better, and support larger plants. Drainage holes prevent root rot—if your favorite pot lacks holes, drill some or use it as a decorative cover over a nursery pot with drainage.
Quality potting mix outperforms garden soil in containers. It drains well while retaining moisture and nutrients. Mix in slow-release fertilizer at planting time. Container plants need more frequent feeding than in-ground plants since nutrients wash out with watering.
Group containers in odd numbers for visual appeal. Cluster three or five pots of varying heights creates more impact than spacing them evenly. Repeat similar plants or colors throughout the space to tie arrangements together.
Low-Maintenance Landscaping
Outdoor living spaces should reduce work, not create more. Choose low-maintenance plants that thrive with minimal intervention. Drought-tolerant plants reduce watering needs. Native plants resist local pests and diseases without chemical treatments.
Mulch reduces weeding, conserves moisture, and regulates soil temperature. Apply 2-3 inches of organic mulch like shredded bark or wood chips around plants. Replenish mulch annually as it decomposes. Avoid piling mulch against plant stems, which can cause rot.
Install irrigation systems to simplify watering. Drip irrigation delivers water directly to root zones, reducing waste and disease risk. Timers automate watering so you don’t have to remember. Smart controllers adjust watering based on weather conditions.
Design beds with defined edges to minimize maintenance. Metal, plastic, or stone edging prevents grass from creeping into planted areas. Edging also makes mowing easier by eliminating the need for trimming around individual plants.
Budget-Friendly Tips for Creating Your Space:
- ►Start with a single zone and expand over time instead of trying to complete everything at once
- ►Buy furniture and major items during off-season sales for significant savings
- ►DIY simple projects like installing pavers or building planters to reduce labor costs
- ►Use native plants that require less water and maintenance over time
- ►Invest in quality pieces for high-use items and save on decorative accessories
Entertainment and Technology Integration
Modern outdoor living spaces incorporate entertainment and technology seamlessly. You can enjoy movies, music, games, and connectivity without compromising the outdoor experience. Smart integration enhances function without creating visual clutter.
Outdoor Audio Systems
Music enhances outdoor gatherings. Weatherproof speakers deliver quality sound while withstanding the elements. In-ground rock speakers blend into landscaping. Wall-mounted or hanging speakers work well on covered patios.
Bluetooth speakers offer the simplest solution. Place portable speakers around your space and connect them to your phone or tablet. Quality portable speakers now deliver impressive sound with 10+ hours of battery life.
Wired outdoor speaker systems provide the best sound quality and reliability. Run speaker wire underground during construction to avoid visible cables. Connect multiple speakers to a central receiver or amplifier. Zone controls let you adjust volume in different areas independently.
Wireless outdoor speaker systems combine permanent installation with wireless connectivity. Speakers connect to power but receive audio signals wirelessly. This approach eliminates audio cable runs while maintaining consistent placement and sound quality.
Outdoor Television and Projection
Outdoor TVs bring entertainment outside for movie nights and game days. Purpose-built outdoor televisions resist weather and sun glare. They cost more than indoor models but handle temperature extremes and moisture exposure.
Indoor TVs work outside temporarily but shouldn’t be left exposed. Place them in weatherproof enclosures if you want permanent installation. These cabinets protect against moisture and temperature while allowing remote control operation.
Outdoor projectors create theater experiences under the stars. Short-throw projectors work in smaller spaces. Position them on stable surfaces or permanent mounts. Pair projectors with outdoor projection screens for best image quality, or project onto light-colored walls or outdoor movie screens.
Consider viewing conditions when planning outdoor entertainment. Covered areas with shade work better during daytime. Evening viewing provides better contrast and image quality. Position screens and TVs to minimize glare from windows, lights, or setting sun.
Smart Home Integration
Smart technology extends indoor convenience to outdoor spaces. Voice assistants like Alexa or Google Assistant control lights, music, temperature, and more. Wall-mounted tablets serve as central control panels for all systems.
Smart lighting systems let you control outdoor lights from your phone. Schedule lights to turn on at sunset or adjust colors and brightness for different moods. Many systems integrate with motion sensors for security and convenience.
Weather sensors trigger automatic responses. Wind sensors close awnings before damage occurs. Rain sensors shut off irrigation systems. Temperature sensors activate heaters when it gets cool or fans when it heats up.
According to research from the National Institute of Standards and Technology, smart home integration improves energy efficiency while enhancing convenience. These benefits extend to outdoor living spaces through automated lighting, climate control, and energy monitoring.
Power and Connectivity
Adequate electrical outlets prevent extension cord tangles. Install weatherproof outlets in convenient locations throughout your outdoor living space. GFCI protection prevents shock hazards near water. Cover unused outlets to keep moisture out.
USB charging ports keep devices powered without adapters. Built-in USB outlets or charging stations let guests charge phones while socializing. Solar-powered charging stations work in sunny locations without requiring wiring.
WiFi coverage ensures connectivity throughout your outdoor space. Extend indoor networks with outdoor access points or mesh WiFi systems. Position equipment to cover gathering areas where people will use devices.
Cable management keeps wires organized and protected. Run cables through walls, underground conduits, or along structure edges. Use cable clips or raceways to secure visible wiring. Hide power supplies and equipment in weatherproof boxes or cabinets.
Weatherproofing and Year-Round Use
The best outdoor living spaces function across seasons. Strategic design and weatherproofing extend usability beyond summer months. Even in challenging climates, you can create comfortable outdoor areas that work year-round.
Protection from Elements
Roof coverage provides the most effective weather protection. Full roofs over patios block sun and rain completely. Partial coverage balances protection with openness. Position solid roofing over dining and cooking areas where you need most protection.
Retractable canopies offer flexibility. Open them during good weather to enjoy the sky. Close them when sun or rain becomes problematic. Motorized systems operate with button-press convenience. Manual systems cost less but require more effort.
Windbreaks make spaces usable on breezy days. Solid walls block wind completely but feel closed-in. Partial screens or slatted designs break wind while maintaining views and airflow. Position screens perpendicular to prevailing winds for maximum effect.
Drainage prevents water accumulation and foundation damage. Slope all horizontal surfaces slightly to direct water away from structures. Install gutters and downspouts on covered areas. French drains handle water in problem areas where surface drainage isn’t sufficient.
Seasonal Adaptations
Spring brings pollen, rain, and temperature swings. Keep cleaning supplies handy to wipe down surfaces after storms. Apply protective treatments to furniture before heavy use begins. Check that irrigation systems function properly after winter dormancy.
Summer demands sun and heat management. Deploy all available shade options. Use light-colored fabrics and materials that reflect heat rather than absorbing it. Keep outdoor refrigerators stocked with cold drinks. Run fans to increase air circulation.
Fall offers ideal outdoor weather in many regions. Deep-clean furniture and structures before winter. Apply weatherproofing treatments to wood and fabric. Drain and store water features before freezing temperatures arrive. Cover or store items that won’t be used during winter.
Winter restricts outdoor use in cold climates but doesn’t eliminate it. Fire features create cozy gathering spots on crisp evenings. Heated elements like chair warmers and blankets extend comfort. Cover furniture to protect from snow and ice. Perform maintenance on equipment during the off-season.
Maintenance Schedules
Regular maintenance prevents major problems and extends life spans. Create a maintenance calendar that tracks seasonal tasks. Consistent attention takes less time than addressing neglected issues.
Weekly tasks include sweeping debris, wiping down surfaces, and spot-cleaning stains. Empty trash containers and refresh ice in beverage centers. Water container plants and check irrigation systems for proper operation.
Monthly maintenance involves deep-cleaning furniture, washing cushion covers, and inspecting for damage. Tighten loose hardware on furniture and structures. Test lighting systems and replace bulbs as needed. Clean grill grates and empty ash from fire features.
Seasonal maintenance includes pressure-washing hard surfaces, applying protective treatments, and preparing for upcoming weather. Service mechanical systems like heaters and fans before heavy use periods. Trim nearby plants that might damage structures or create excessive debris.
Budget Planning and Cost Management
Creating an outdoor living space requires realistic budgeting. Costs vary dramatically based on size, materials, and features. Understanding expense categories helps you allocate resources effectively and avoid budget overruns.
Breaking Down Costs
Foundation and hardscaping typically consume 30-40% of total budget. Concrete patios cost $5-15 per square foot installed. Pavers run $10-25 per square foot. Natural stone reaches $15-40 per square foot. These prices include materials and professional installation.
Structure and cover elements take another 20-30% of budget. Basic pergolas start around $2,000 for DIY kits. Custom designs cost $5,000-15,000 depending on size and materials. Solid-roof structures cost more but provide superior protection.
Furniture and decor account for 15-25% of expenses. Budget-friendly sets start around $500 for basic seating. Mid-range options run $1,500-3,000. High-end furniture easily exceeds $5,000. Remember that quality pieces last longer and provide better value over time.
Appliances and features vary widely. Basic grills cost $200-800. Built-in grills with side burners run $1,000-4,000. Outdoor kitchen islands start around $3,000 for simple designs and exceed $20,000 for fully-equipped setups. Fire pits range from $100 for portable units to $5,000+ for custom fireplaces.
Phased Implementation
You don’t need to complete everything at once. Phased construction spreads costs over time and lets you learn what works before committing to permanent features. Start with essential elements and add upgrades as budget allows.
Phase one establishes basic function. Install foundation flooring and essential seating. Add basic lighting and one cooking element. This phase creates a usable space where you can begin enjoying outdoor time immediately.
Phase two enhances comfort and capability. Add cover structures, upgrade furniture, and incorporate your first major feature like a fire pit or outdoor kitchen. Install better lighting and sound systems. Improve landscaping around the core space.
Phase three adds luxury touches and specialized features. Include water features, premium appliances, or elaborate entertainment systems. Expand zones and refine details. This phase transforms good spaces into exceptional ones.
The Consumer Financial Protection Bureau recommends careful planning when financing home improvements. Consider whether the improvements will add value to your property and fit within your overall financial picture.
DIY vs Professional Installation
Labor costs often equal or exceed material costs for outdoor projects. Doing work yourself can cut total expenses by 40-60%. But DIY requires time, tools, and skills. Evaluate each task based on your capabilities and available time.
Good DIY projects include furniture assembly, planting, painting, and simple electrical work. These tasks require basic skills and common tools. Mistakes cause minimal damage and easy correction.
Hire professionals for complex structural work, gas line installation, and major electrical projects. These jobs require specialized knowledge, expensive tools, and proper licensing. Poor execution creates safety hazards and reduces home value.
Hybrid approaches balance cost and quality. Have professionals handle challenging elements like concrete pours or gas connections. Complete finishing work, installation, and decorating yourself. This strategy captures savings while ensuring critical work meets standards.
Getting the Best Value
Shop sales and seasonal clearances for major purchases. Patio furniture goes on sale in late summer and fall. Grills see deep discounts after summer holidays. Plan ahead to capture these savings.
Compare multiple quotes for professional work. Get at least three estimates for any major project. Evaluate based on total value, not just price. The cheapest bid may use inferior materials or cut corners.
Invest in quality where it matters most. Spend more on items that face constant use and weather exposure. Foundations, roofing, and appliances justify premium prices. Save on decorative elements and accessories that you can easily replace.
Consider total cost of ownership. Cheap items that fail quickly cost more over time than quality pieces that last. Factor in maintenance requirements and replacement frequency when comparing options.
Frequently Asked Questions
How much does it cost to create a basic outdoor living space?
A basic outdoor living space costs between $3,000 and $10,000 depending on size and materials. This budget covers a concrete or paver patio foundation, basic outdoor furniture, simple lighting, and a portable grill. You can start smaller with just a seating area for $1,500-3,000, then expand over time. Larger spaces with premium materials, built-in features, and professional installation typically run $15,000-50,000. Create a detailed plan with measurements and material choices to get accurate estimates for your specific project.
What permits do I need for an outdoor living space?
Permit requirements vary by location and project scope. Simple projects like adding furniture or portable fire pits rarely require permits. Permanent structures, electrical work, gas line installation, and significant grading typically need permits. Most areas require permits for covered structures over certain sizes, anything attached to your house, and any project involving plumbing. Contact your local building department before starting work. They provide specific requirements for your area and explain the permit application process. Working without required permits can result in fines and complications when selling your home.
How do I protect outdoor furniture during winter?
Clean furniture thoroughly before winter storage. Wash frames with soap and water, and clean cushions according to manufacturer instructions. Let everything dry completely to prevent mildew. Store cushions indoors in a dry location like a garage, basement, or shed. Cover furniture frames with weatherproof covers designed for outdoor use. Ensure covers fit snugly and secure them against wind. For furniture that can’t be covered or moved, apply protective treatments according to material type. Store glass table tops separately if possible to prevent breakage from ice or heavy snow. Regularly remove accumulated snow from covered furniture to prevent damage from excessive weight.
Can I build an outdoor living space on a tight budget?
You can create a functional outdoor living space on almost any budget by starting small and choosing affordable materials. Use concrete pavers instead of natural stone for flooring—they cost much less but still look good. Build simple seating from concrete blocks and lumber for under $200. String lights provide attractive lighting for $20-50. A portable fire pit creates ambiance for $100-200. Buy furniture on sale or check online marketplaces for gently-used pieces. Start with one zone and expand as budget allows. Focus on making a small area comfortable rather than trying to do everything at once. DIY projects save substantial money on labor costs while building sweat equity in your property.
What are the most important features for an outdoor living space?
The most important features depend on how you plan to use the space, but several elements improve almost every outdoor area. Comfortable seating ranks first—without good places to sit, people won’t spend time outside. Adequate lighting extends usability into evening hours and improves safety. Some form of shade protection makes the space comfortable during hot days. Easy access from the house encourages regular use. A flat, stable surface provides a foundation for furniture and activities. Beyond these basics, add features based on your priorities. If you cook outside frequently, invest in a good grill and prep area. If you entertain often, create multiple seating zones. If you want relaxation, focus on comfortable lounging areas with privacy screening.
Final Thoughts
Your outdoor living space represents more than just another home improvement project. It creates a place where life happens—where you gather with family, host friends, find quiet moments, and connect with nature. The planning and effort you invest today will pay dividends through years of enjoyment and increased property value.
Start with clear goals based on how you want to use the space. Build a solid foundation with quality materials in critical areas. Add features gradually as budget allows. Maintain what you create so it continues serving you well. Most importantly, actually use your outdoor space. The best design in the world provides no value if it sits empty.
Take the first step today. Measure your space, sketch some ideas, and set a realistic budget. Research materials and features that appeal to you. Talk to neighbors who have created outdoor spaces. Visit showrooms to see products in person. Each small action moves you closer to the outdoor living space you envision. Your backyard holds incredible potential—unlock it with thoughtful planning and deliberate execution.